Jekyll2023-03-13T22:28:40+02:00https://blog.kstaykov.eu/feed.xmlKalin’s BlogThis is my personal blog.Kalin Staykovk.t.staykov@gmail.comhttp://www.kstaykov.euNostr - microblogging for the free2023-03-13T21:00:00+02:002023-03-13T21:00:00+02:00https://blog.kstaykov.eu/dev/nostr-microblogging-for-the-freeI have a love/hate relationship with Twitter. I love it for the way I can follow people I find interesting, I like glancing at new updates and generally following topics I like. But I find it irritating that in the end of the day it’s just a platform that exploits my attention to make me look at ads.
I was looking for an alternative that is more open and free of the corporate control. I found Nostr. It has a public protocol and all implementations I’ve seen are opensource. What got me interested is not just that is decentralised but also how simple it is. It uses web sockets and messages of given type. Relays are exchanging those messages between them and users can decide which relays to use. Having that simplicity is a good starting point because it makes it easy to adopt and start using even from development perspective.
But if you ever want to try it out with a Nostr client keep in mind that web sockets just like http have a way to work with or without TLS. In other words:
Use ws:// when you want insecure connection similar to http://
Use wss:// when you want secure (TLS/SSL) connection similar to https://
Having to terminate SSL during development is tedious but most clients should support ws:// so you can experiment with relays if you want.
Another interesting library used in the relayer is this one:
That’s the most feature rich library I’ve seen for Go. There are other implementations in other languages too so it seems that the ecosystem around Nostr is growing. It is also being complimented by the ability to send zaps (SATS or Satoshi) which is small pieces of a bitcoin. The Satoshi (named after the creator of Bitcoin) is actually the smallest amount (denomination) of Bitcoin and is equal 0,00000001 BTC. That is a pretty small value and people often use it to zap posts made on Nostr which creates a value-for-value system. You like a post, you can zap it. This gives a few Satoshi coins to the creator of the post which is a great way for us to support one another.
What is more important is that we have building blocks that enable many use cases. We have:
Ability to connect with one another and share messages
Ability to decentralise the system that spreads the messages so it is protected from censorship
Ability to encrypt private messages
Ability to integrate value transfer by means of Bitcoin lightning transactions
This can be foundation to many use case implementations - shops, games, services, etc. I hope to see this system used for great new things.
]]>Kalin Staykovk.t.staykov@gmail.comhttp://www.kstaykov.euLinux Kernel - back to basics2023-02-15T12:53:00+02:002023-02-15T12:53:00+02:00https://blog.kstaykov.eu/devops/back-to-basics-kernelIt’s remarkable how time flies. It didn’t feel so long ago when I was building my own Linux kernel on PC with 8 MB of memory. But it was indeed long time ago..
I have the rare occasion to do it again today for a project I’m working on. It’s funny how rare this is nowadays. We are using it almost all the time but mostly through Linux distributions - Ubuntu, Debian, Fedora and so on. But here I am looking at the build slowly going through drivers/net/ethernet/... again and I feel nostalgic.
The other funny thing is that make menuconfig feels kind of new. It’s the exact same menu interface but I had to read through the items because most I am seeing either for the first time or I had forgotten about them. So, I defaulted and didn’t do any edits - yeah, I’m busy! No time to hack around :D
Another interesting thing I found was those scripts I had to run:
I don’t recall having to do that back in the old days. I guess this says a lot about how far we went in terms of security. It’s a whole new world we live in now but I’m glad I had the chance of experiencing the déjà vu moment of building my own kernel again.
]]>Kalin Staykovk.t.staykov@gmail.comhttp://www.kstaykov.euSensu - Getting Started2021-02-06T21:23:00+02:002021-02-06T21:23:00+02:00https://blog.kstaykov.eu/devops/Sensu-getting-startedMonitoring is often a sore topic. It’s crucial to get it right and get a grasp of what’s going on with your infrastructure. The more details you have during a failure the quicker you’ll act and recover from it. There are many solutions out there like Nagios, Shinken, Zabbix, Icinga to just name a few. And they are all great. Today I’ll show you Sensu which is one of the options I really like. It was rewritten in Go and has features that in my opinion makes it stand out:
Simple - two native binaries talking. One is an agent (host being monitored) and the other a backend (Sensu’s “mothership”).
Powerful cli called sensuctl.
Feels like Kubernetes with its declarative configuration.
Packs all the right stuff you need in a monitoring platform - from the check to the alert with great options to automate and remediate in between.
Event driven - it’s so much more than just alerting about abnormal condition since every event can be handled in any way you like.
Feels like a framework, not just a tool.
Easy to extend via its powerful asset management.
And those are just a few of its great treats. To get started I would suggest to walk through a simple docker setup with one backend and an agent. According to its documentation at https://sensu.io/ that would involve a few steps:
When just starting it’s nice to follow those steps and make the UI and cli work quickly to get a sense of accomplishment. Sensu does make this process easy as you can see in those few steps. Take your time and click through the UI which will be available on port :3000. Also get a feel for its cli interface:
➜  ~ sensuctl
sensuctl controls Sensu instances

Usage:	sensuctl COMMAND

Flags:
      --api-url string             host URL of Sensu installation
      --cache-dir string           path to directory containing cache & temporary files (default "/Users/kstaykov/Library/Caches/sensu/sensuctl")
      --config-dir string          path to directory containing configuration files (default "/Users/kstaykov/.config/sensu/sensuctl")
  -h, --help                       help for sensuctl
      --insecure-skip-tls-verify   skip TLS certificate verification (not recommended!)
      --namespace string           namespace in which we perform actions (default "default")
      --timeout duration           timeout when communicating with sensu backend (default 15s)
      --trusted-ca-file string     TLS CA certificate bundle in PEM format

Commands:
  completion           Output shell completion code for the specified shell (bash or zsh)
  configure            Initialize sensuctl configuration
  create               Create or replace resources from file or URL (path, file://, http[s]://), or STDIN otherwise.
  delete               Delete resources from file or STDIN
  describe-type        Print details about the supported API resources types
  dump                 Dump resource definitions to JSON or YAML
  edit                 Edit resources interactively
  env                  Display the commands to set up the environment used by sensuctl
  logout               Logout from sensuctl
  prune                Deletes resources that do not appear in the configs from file or URL (path, file://, http[s]://), or STDIN otherwise.
  version              Show the sensuctl version information

Management Commands:
  api-key              Manage apikeys
  asset                Manage assets
  auth                 Manage authentication drivers
  check                Manage checks
  cluster              Manage sensu cluster
  cluster-role         Manage cluster roles
  cluster-role-binding Manage cluster role bindings
  command              Manage sensuctl commands
  config               Modify sensuctl configuration
  entity               Manage entities
  event                Manage events
  filter               Manage filters
  handler              Manage handlers
  hook                 Manage hooks
  license              Manage enterprise license
  login                Authenticate sensuctl to Sensu using the provided arguments
  mutator              Manage mutators
  namespace            Manage namespaces
  role                 Manage roles
  role-binding         Manage role bindings
  secret               Manage secrets
  silenced             Manage silenced subscriptions and checks
  tessen               Manage tessen configuration
  user                 Manage users

Run 'sensuctl COMMAND --help' for more information on a command.
➜  ~
I won’t get into more details in this getting started article but do you remember when I said that it feels like Kubernetes? I’ll give you a small hint. Check out the sensuctl dump all command. This is how anything you configure can be dumped to declarative code that you can put in version control. You can also use sensuctl create -f <yaml file> to bring that configuration into play on the backend you have running. Don’t forget to sensuctl login first.
]]>Kalin Staykovk.t.staykov@gmail.comhttp://www.kstaykov.euKubernetes taint - what is it and how to work with it?2018-12-29T08:51:00+02:002018-12-29T08:51:00+02:00https://blog.kstaykov.eu/devops/Kubernetes-taintTaint and affinity control what pods should be repelled by the nodes (taint) and where the pods would be attracted to (affinity). That’s one of the great features of Kubernetes but there is a catch. If you run a single node cluster on your laptop (the way I like to do :)) you will often hit on a common taint - the NoSchedule one. It’s set to prevent scheduling on the master node and if you try to put some pods to play with (like Helm) you will probably hit on this problem:
[root@phix ~]# kubectl get pods --all-namespaces
NAMESPACE     NAME                                   READY   STATUS    RESTARTS   AGE
kube-system   coredns-86c58d9df4-nl4hq               1/1     Running   0          11h
kube-system   coredns-86c58d9df4-wbg8x               1/1     Running   0          11h
kube-system   etcd-phix                              1/1     Running   0          11h
kube-system   kube-apiserver-phix                    1/1     Running   0          11h
kube-system   kube-controller-manager-phix           1/1     Running   1          11h
kube-system   kube-flannel-ds-amd64-jtkqn            1/1     Running   0          11h
kube-system   kube-proxy-fqg5b                       1/1     Running   0          11h
kube-system   kube-scheduler-phix                    1/1     Running   1          11h
kube-system   kubernetes-dashboard-57df4db6b-cptdn   1/1     Running   0          11h
kube-system   tiller-deploy-8485766469-pd9ss         0/1     Pending   0          89s
[root@phix ~]# kubectl -n kube-system describe pod tiller-deploy-8485766469-pd9ss
Name:               tiller-deploy-8485766469-pd9ss
Namespace:          kube-system
Priority:           0
PriorityClassName:  <none>
Node:               <none>
Labels:             app=helm
                    name=tiller
                    pod-template-hash=8485766469
Annotations:        <none>
Status:             Pending
IP:
Controlled By:      ReplicaSet/tiller-deploy-8485766469
Containers:
  tiller:
    Image:       gcr.io/kubernetes-helm/tiller:v2.12.1
    Ports:       44134/TCP, 44135/TCP
    Host Ports:  0/TCP, 0/TCP
    Liveness:    http-get http://:44135/liveness delay=1s timeout=1s period=10s #success=1 #failure=3
    Readiness:   http-get http://:44135/readiness delay=1s timeout=1s period=10s #success=1 #failure=3
    Environment:
      TILLER_NAMESPACE:    kube-system
      TILLER_HISTORY_MAX:  0
    Mounts:
      /var/run/secrets/kubernetes.io/serviceaccount from tiller-token-b65qd (ro)
Conditions:
  Type           Status
  PodScheduled   False
Volumes:
  tiller-token-b65qd:
    Type:        Secret (a volume populated by a Secret)
    SecretName:  tiller-token-b65qd
    Optional:    false
QoS Class:       BestEffort
Node-Selectors:  <none>
Tolerations:     node.kubernetes.io/not-ready:NoExecute for 300s
                 node.kubernetes.io/unreachable:NoExecute for 300s
Events:
  Type     Reason            Age                  From               Message
  ----     ------            ----                 ----               -------
  Warning  FailedScheduling  104s (x2 over 104s)  default-scheduler  0/1 nodes are available: 1 node(s) had taints that the pod didn't tolerate.
[root@phix ~]#
The simple solution would be to remove this taint.
Notice the minus sign at the end of the taint removal command.
Note for production: this is bad idea for production. Normally if you run a Kubernetes cluster you would not have just the master node but also worker nodes. In such cases it’s a great idea to keep the master node NoSchedule taint and repel pods trying to schedule on it. By design the worker nodes should be the ones taking pods.
]]>Kalin Staykovk.t.staykov@gmail.comhttp://www.kstaykov.euHow to deploy Django application using Chef2018-12-20T14:51:00+02:002018-12-20T14:51:00+02:00https://blog.kstaykov.eu/devops/deploy-django-app-via-chefDjango is a popular Python web framework. I’ve been asked a couple of times how Python based applications can be automated so here I’ll give an example.
We’ll be using Chef. Before we get started let’s discuss most of the items that make Chef’s ecosystem.
Recipe - a set of steps to make something happen. Just like a recipe for cake. In our case think of it as the recipe of how to build our application or install some dependencies.
Cookbook - well.. a collection of recipes. Plus few more things we’ll be playing with shortly.
There are different commands like knife but we won’t discuss them in much detail. Now we’ll go over one cookbook used to deploy the following Django app:
It’s a real world example of a web application that I found not long ago. It has most of the things you would see in such app - database, frontend, some backend.
All Chef code we are going to use to deploy this application is here:
The most important files we’ll be looking at are located at the recipes folder.
Here’s what recipes we have in their order of execution:
install_packages - this one installs some package dependencies using apt-get
We’ll be deploying to Ubuntu. It’s of course an option to support multiple Linux families like Arch, RedHat and Debian in the same cookbook but that’s a more advanced setup we won’t cover here.
create_user - creates django user and group
pyenv - setups python virtual environment
app - deploy the application
Here’s one example of a recipe:
## Cookbook:: django-realworld# Recipe:: install_packages## Copyright:: 2018, The Authors, All Rights Reserved.execute"update-package-cache"docommand"sudo apt-get update"action:runendexecute"install-build-essential"docommand"sudo apt-get install -y build-essential checkinstall"action:runendexecute"install-prereq"docommand"sudo apt-get install -y libreadline-gplv2-dev libncursesw5-dev libssl-dev libsqlite3-dev tk-dev libgdbm-dev libc6-dev libbz2-dev"action:runend
Here we execute commands but you would often employ Chef’s functions. Like in here:
Notice that we’re using a resource called git which comes with Chef’s namespace and handles git related work. If you want to learn more about the git resource go read the docs here:
Every time you need to write something you can check for pre-defined resource you can use and build things up from there. Of course you can also use Ruby directly. I would prefer to use pre-defined resources because this often saves me a lot of time and I know that those implementations are safe and tested. They are probably much better than what I would come up with now because I’ll be using it in just my cookbook while the pre-defined resources are used by the whole community.
The Chef Cookbook Structure - tests
Just like with software development it’s a good idea to write tests. Tests that cover the functionality of our cookbook are critical for the long-term success of our CI/CD pipelines. It will help us make future changes easier and feel more secure that we won’t break the deployment chain of events and impair our production releases.
Tests are located in their test directory and in our case they cover one to one each recipe.
Notice that the whole syntax is pure Ruby. The interesting part is the describe method. For the testing part you can start with ChefSpec which is the main facility for writing Chef tests. You can find it here:
There is more to testing. You can mock all kinds of objects that you don’t normally have. Imagine for example that in production you need a mysql database. Or maybe Kafka or Zookeeper. They will provide some service to your application that during testing you don’t need to have. You can safely mock it and make your tests run independently and quickly which is one of the most important thing about tests.
Don’t go and engineer your whole recipes just so you can test them. If you put data in your database during a recipe mock that data up in your test and expect it to be there while you are smoke testing your recipe. That way you’ll know that when you call the real database your smoke will indeed check this data and validate it the way your described.
OK, we have some recipes and tests. How can we really see them run? That’s the fun part. Let’s go and checkout Kitchen.
Testing Cookbooks with Kitchen - configuration
The first thing to do when you want to develop Chef cookbook is install Chef DK or nowadays you can also take advantage of the great Chef Workstation. It has some advantages but it’s still in its early days. Both tools will have the kitchen command.
Here’s our Kitchen definition file called .kitchen.yml:
---driver:
name: vagrantcustomize:
memory: 4096cpuexecutioncap: 100provisioner:
name: chef_zero# You may wish to disable always updating cookbooks in CI or other testing environments.# For example:# always_update_cookbooks: <%= !ENV['CI'] %>always_update_cookbooks: trueverifier:
name: inspecplatforms:
-name: ubuntu/xenial64suites:
-name: defaultrun_list:
-recipe[django-realworld::install_packages]-recipe[django-realworld::create_user]-recipe[django-realworld::pyenv]-recipe[django-realworld::app]# verifier:# inspec_tests:# - test/integration/defaultattributes:
It’s your door to quick and easy development so let’s see what each section does.
Driver - that’s the hypervisor you’ll be using when Kitchen runs. In our case we’ll use Virtualbox via a tool called Vagrant.
Provisioner - that’s our automation tool and while we write Chef Cookbooks we’ll be using chef_zero.
Verifier - testing facility.
Platform - what image we will use. As I said we’ll be using Ubuntu image.
Suites - how many different systems (or VMs in our case) we will build to test with. Here we also put every recipe we want to run.
Testing Cookbooks with Kitchen - execution
kitchen create - creates the VM.
kitchen converge - runs the Chef recipes as defined in the Kitchen configuration file and created in our Cookbook.
kitchen verify - run tests.
kitchen destroy - destroys the VM.
This is one nice order of execution while you’re building things up. If you want to quickly test you can also do:
kitchen test - creates VM and run tests.
If you have a VM created via kitchen create you can also login to the VM.
kitchen login <name> - logins to a suite. In our case since we have only one we can just say kitchen login or if we feel more expressive we can still say kitchen login default.
Summary
In this article you saw how to:
Create Chef Cookbook recipes
Create Chef Cookbook tests
Use Kitchen to aid you while creating or testing your cookbooks
]]>Kalin Staykovk.t.staykov@gmail.comhttp://www.kstaykov.euHow to create admin user in Kubernetes to login to Dashboard2018-10-28T10:51:00+02:002018-10-28T10:51:00+02:00https://blog.kstaykov.eu/devops/kubernetes-admin-userThere are cheap Kubernetes clusters out there and nowadays people like to do some tests. In this short article I will show you how to create a simple admin user with complete access easily. I’ll also show you how to enjoy the Kubernetes Dashboard on a DigitalOcean (or any other) cluster.
I would assume that you created your cluster. Within DigitalOcean this is as simple as a click. If you don’t have access to DO already you can use this ref link and get $100 of services for free:
Before we start to make things even easier let’s create a simple alias. I called my alias “kube” and it will be referring the –kubeconfig at all times. I’ll be using it throughout this article so adjust your environment to your liking so you can follow along. Here’s my alias:
[kstaykov@manja ~]$ alias kube
alias kube='kubectl --kubeconfig=/home/kstaykov/Downloads/k8s-1-11-1-do-1-lon1-1540329911350-kubeconfig.yaml'
[kstaykov@manja ~]$
Now it’s time to setup your service account. Use this command:
kube create -n kube-system serviceaccount admin
Notice that I created my service account in the kube-system namespace. If you want to know what namespaces you have you can get them using:
kube get namespaces
Now let’s put on a very permissive role binding setting for our cluster.
Note that this policy will allow for ALL service accounts to act as administrators. Bare it in mind and don’t use this for production service. The concept of this article is to make a simple testing cluster.
Now it’s time to get the configuration of our user.
I removed the ca.crt and token data but you should be able to see some big strings there. Notice that the token is base64 encoded. Use a command such as this to decode it:
echo "put-token-here" | base64 --decode
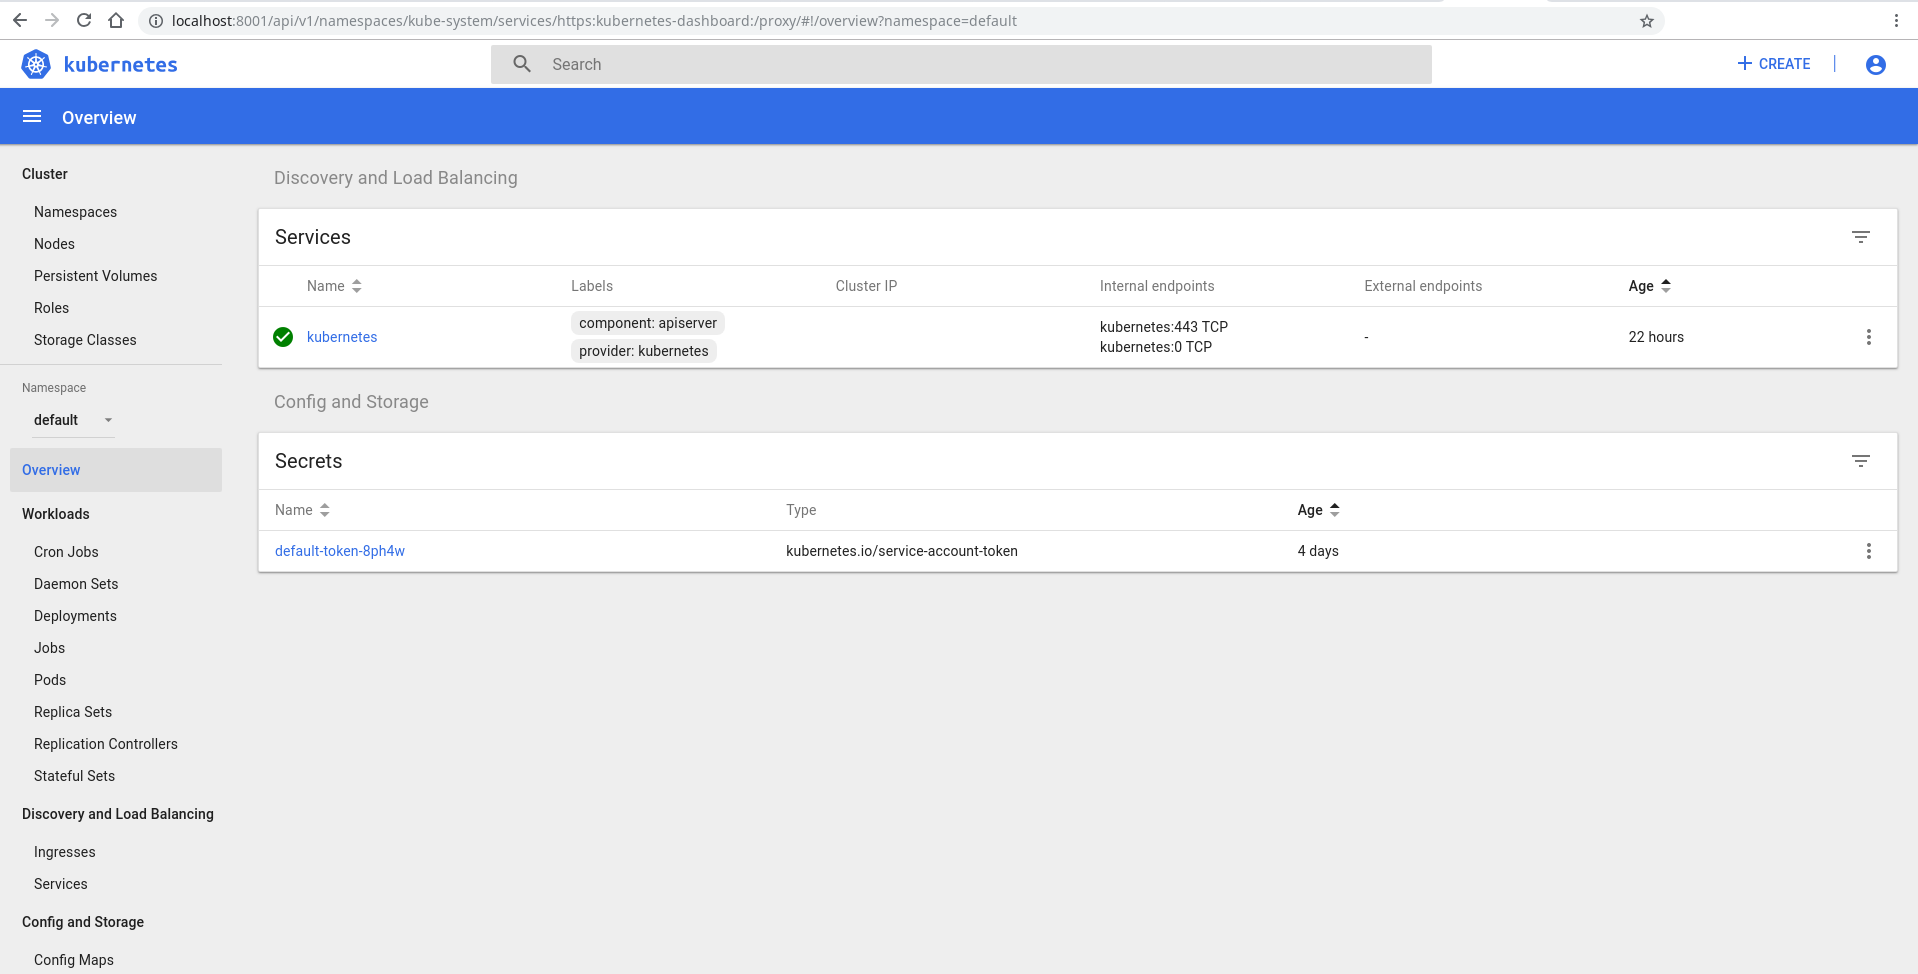
Now you should have a different string and that’s your true token. Keep this private as it has complete access over your cluster! Time to use it to login to the Dashboard. Open a proxy to the cluster:
kube proxy
This will open port 8001 on your machine and using it you can proxy to the API of the cluster. It’s a tunnel of a sort. Go to this URI:
Login using token authentication and use the token you decoded.
There you go! The Kubernetes Dashboard.
]]>Kalin Staykovk.t.staykov@gmail.comhttp://www.kstaykov.euStart Jenkins on DigitalOcean’s Kubernetes Service2018-10-21T17:46:00+03:002018-10-21T17:46:00+03:00https://blog.kstaykov.eu/devops/jenkins-on-kubernetes-digitaloceanDigitalOcean recently released to a set of users their new Kubernetes service which is really great. So, I decided to do yet another Jenkins over Kubernetes tutorial for you. It’s close to what I showed you previously but customized for DigitalOcean. You can grab an instance for as little as $5 per month. It’s the perfect testing ground - cheap and stable. If you don’t already have an account go grab one with this promotion code and get $100 of services on their entire platform:
Did you get it? Good. Now let’s install Jenkins and create a ‘Hello, World!’ pipeline. First we’ll need to initialize our helm. Helm is a tool used for Kubernetes package management. First you’ll need to download your kubeconfig from the DigitalOcean website. There is a button for that available as soon as you build a cluster. Once done you should be able to use this file to get information on the cluster nodes. I’ll have just one node so here’s my output:
[kstaykov@manja ~]$ kubectl --kubeconfig ~/Downloads/k8s-1-11-1-do-1-fra1-1540131360772-kubeconfig.yaml get nodes
NAME                  STATUS    ROLES     AGE       VERSION
determined-kare-t8i   Ready     <none>    34m       v1.11.1
[kstaykov@manja ~]$
My config file is called “k8s-1-11-1-do-1-fra1-1540131360772-kubeconfig.yaml” and it’s located in my Downloads folder. I’m using the Manjaro Linux distribution but you should have a close experience to this one whatever the OS you use.
Before we can start with Helm we’ll need to tune the cluster a little bit. Use those commands with your kubeconfig:
Simple, ah? You just put the same –kubeconfig option like on the kubectl command. Now let’s install the Jenkins:
[kstaykov@manja Downloads]$ helm --kubeconfig ~/Downloads/k8s-1-11-1-do-1-fra1-1540131360772-kubeconfig.yaml install stable/jenkins
NAME:   wrinkled-seagull
LAST DEPLOYED: Sun Oct 21 17:36:22 2018
NAMESPACE: default
STATUS: DEPLOYED

RESOURCES:
==> v1/Secret
NAME                      TYPE    DATA  AGE
wrinkled-seagull-jenkins  Opaque  2     0s

==> v1/ConfigMap
NAME                            DATA  AGE
wrinkled-seagull-jenkins        5     0s
wrinkled-seagull-jenkins-tests  1     0s

==> v1/PersistentVolumeClaim
NAME                      STATUS   VOLUME            CAPACITY  ACCESS MODES  STORAGECLASS  AGE
wrinkled-seagull-jenkins  Pending  do-block-storage  0s

==> v1/Service
NAME                            TYPE          CLUSTER-IP      EXTERNAL-IP  PORT(S)         AGE
wrinkled-seagull-jenkins-agent  ClusterIP     10.245.125.104  <none>       50000/TCP       0s
wrinkled-seagull-jenkins        LoadBalancer  10.245.59.106   <pending>    8080:32690/TCP  0s

==> v1/Deployment
NAME                      DESIRED  CURRENT  UP-TO-DATE  AVAILABLE  AGE
wrinkled-seagull-jenkins  1        1        1           0          0s

==> v1/Pod(related)
NAME                                       READY  STATUS   RESTARTS  AGE
wrinkled-seagull-jenkins-68f6587f87-gb5p2  0/1    Pending  0         0s


NOTES:
1. Get your 'admin' user password by running:
  printf $(kubectl get secret --namespace default wrinkled-seagull-jenkins -o jsonpath="{.data.jenkins-admin-password}" | base64 --decode);echo
2. Get the Jenkins URL to visit by running these commands in the same shell:
  NOTE: It may take a few minutes for the LoadBalancer IP to be available.
        You can watch the status of by running 'kubectl get svc --namespace default -w wrinkled-seagull-jenkins'
  export SERVICE_IP=$(kubectl get svc --namespace default wrinkled-seagull-jenkins --template  "{{ range (index .status.loadBalancer.ingress 0) }}{{ . }}{{ end }}")
  echo http://$SERVICE_IP:8080/login

3. Login with the password from step 1 and the username: admin

For more information on running Jenkins on Kubernetes, visit:
https://cloud.google.com/solutions/jenkins-on-container-engine

[kstaykov@manja Downloads]$
Perfect! Our Jenkins is on its way to be deployed. Within minutes we should be able to see it. The ‘get all’ command will list things nicely for us:
[kstaykov@manja ~]$ kubectl --kubeconfig ~/Downloads/k8s-1-11-1-do-1-fra1-1540131360772-kubeconfig.yaml get all
NAME                                            READY     STATUS    RESTARTS   AGE
pod/wrinkled-seagull-jenkins-68f6587f87-gb5p2   1/1       Running   0          22m

NAME                                     TYPE           CLUSTER-IP       EXTERNAL-IP       PORT(S)          AGE
service/kubernetes                       ClusterIP      10.245.0.1       <none>            443/TCP          39m
service/wrinkled-seagull-jenkins         LoadBalancer   10.245.59.106    104.248.103.227   8080:32690/TCP   22m
service/wrinkled-seagull-jenkins-agent   ClusterIP      10.245.125.104   <none>            50000/TCP        22m

NAME                                       DESIRED   CURRENT   UP-TO-DATE   AVAILABLE   AGE
deployment.apps/wrinkled-seagull-jenkins   1         1         1            1           22m

NAME                                                  DESIRED   CURRENT   READY     AGE
replicaset.apps/wrinkled-seagull-jenkins-68f6587f87   1         1         1         22m
[kstaykov@manja ~]$
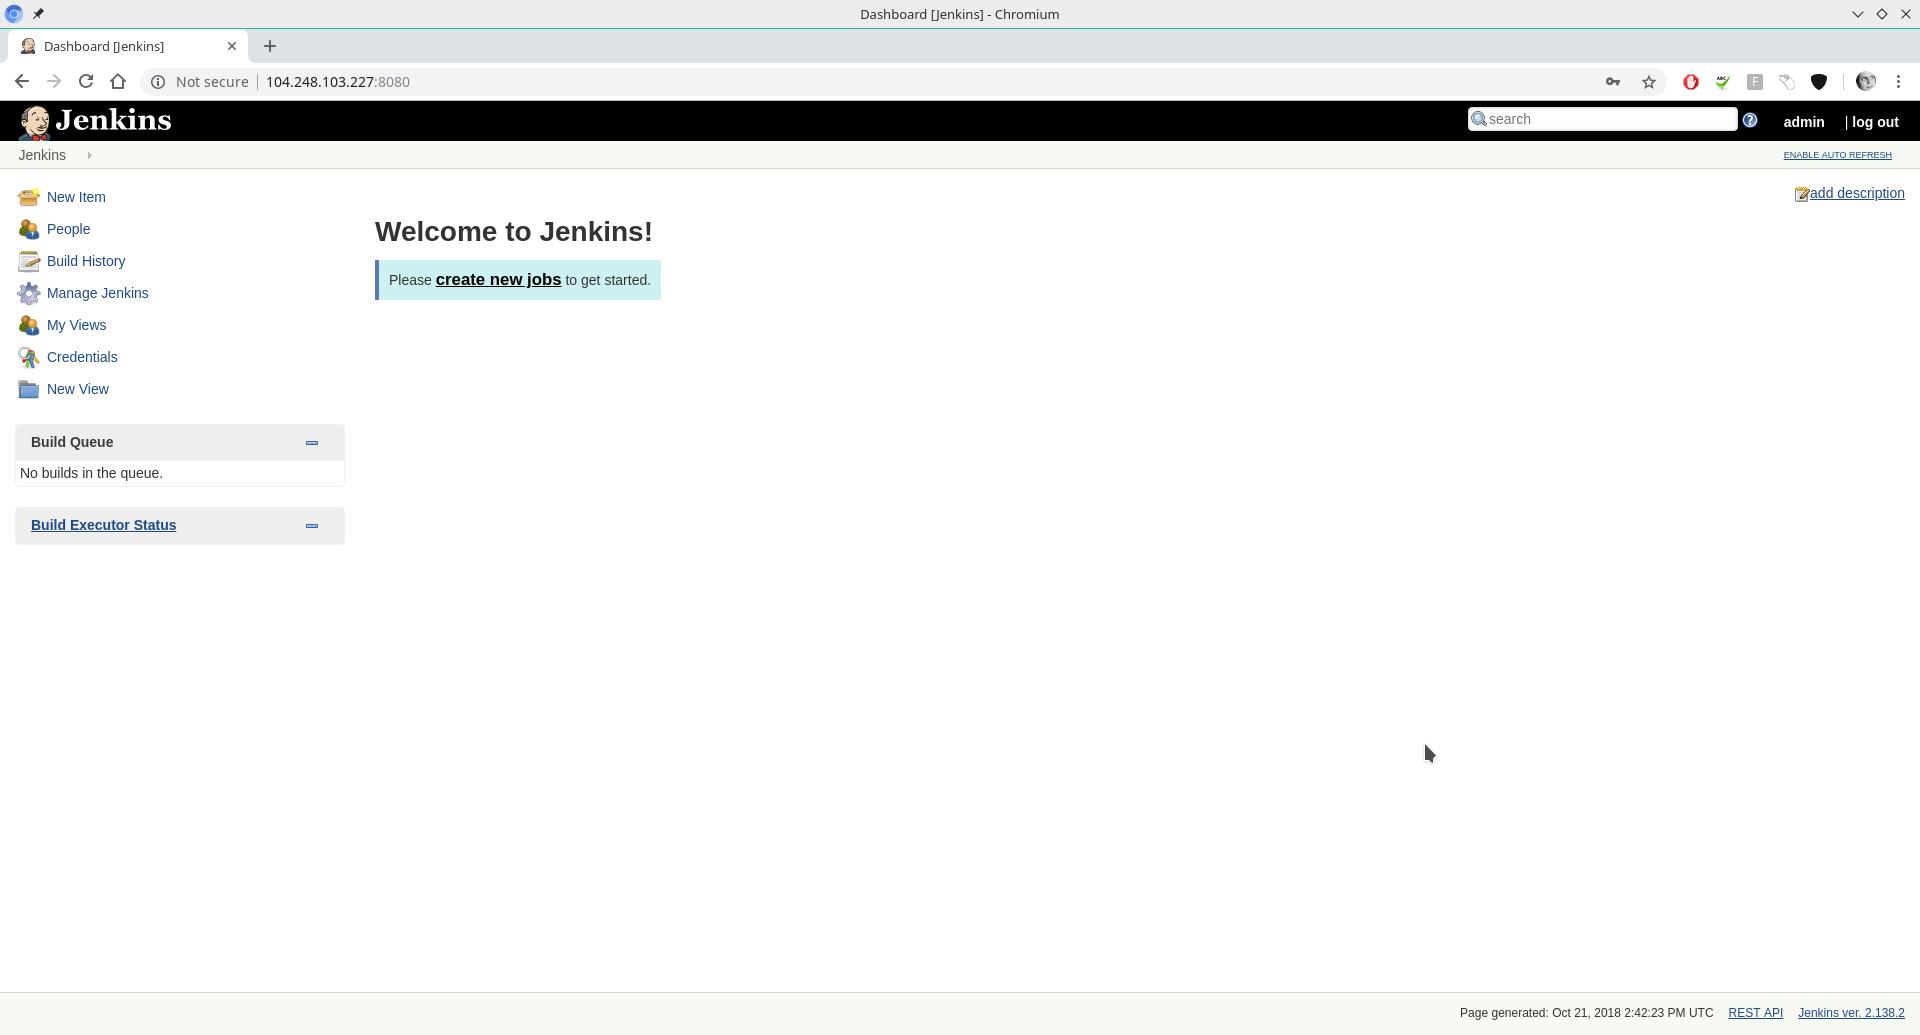
Notice that we have a running pod. This means that Jenkins is already available to us. Also notice the loadbalancer on external IP 104.248.103.227 and port 8080. That’s where we’ll find the login page. Your IP of course will be different and before you try anything on mine be aware that this cluster will be long gone by the time you read this.
Now we only need the password for admin user and we’ll be on our way to create our simple pipeline. Review your output from the installation and you’ll see there is a command left for you. Mine is this one:
]]>Kalin Staykovk.t.staykov@gmail.comhttp://www.kstaykov.euDocker - using multistage build2018-06-30T10:59:00+03:002018-06-30T10:59:00+03:00https://blog.kstaykov.eu/devops/docker-multistage-buildHave you ever tried building code on Docker just to end up with a huge container? Yes? Me too.
I’ll show you the beauty of multistage builds that will enable you to get a result such as this one:
$ docker image ls
REPOSITORY          TAG                 IMAGE ID            CREATED             SIZE
kstaykov/webin      latest              22016f6268d9        12 minutes ago      10.8MB
golang              1.9.7               f9ff4369deb0        2 days ago          750MB
alpine              latest              3fd9065eaf02        5 months ago        4.15MB
$
Notice how big the Golang image is. I’m using it to build my simple Go app but then I’ll host the app on a small alpine image which is only 4.15 MB. In the end my image is just 10.8 MB which is the alpine + my built go binary.
If you have a look at the main.go you’ll see a very simple Go program that prints http headers and some form info to console for debug purposes. I needed something like that to debug web hooks so I put those few lines of code. The problem however is that I need this tool to be very small and easy to grab at some dev machines that have docker installed.
The straight forward approach would be to make one Dockerfile using Golang image and host my code and build there. That would work. Let’s do it.
FROM golang:1.9.7WORKDIR /app/COPY main.go /app/RUN GOOS=linux GOARCH=amd64 CGO_ENABLED=0 GOPATH=`pwd` go build -o webin
CMD ["./app/webin"]
$ docker image ls
REPOSITORY          TAG                 IMAGE ID            CREATED             SIZE
kstaykov/webin      v1                  830a41c49231        2 minutes ago       756MB
golang              1.9.7               f9ff4369deb0        2 days ago          750MB
alpine              latest              3fd9065eaf02        5 months ago        4.15MB
$
Oh, wait. The end product image is 756 MBs in size. That’s not nice. It has everything in there. When I was studying docker I heard someone comparing this to a car factory. Using that analogy what we just did is make a car but the whole factory is still attach to it. That won’t sell well so let’s fix this.
We’ll tune our Dockerfile and build our multistage magic.
FROMgolang:1.9.7asbuilderWORKDIR /app/COPY main.go /app/RUN GOOS=linux GOARCH=amd64 CGO_ENABLED=0 GOPATH=`pwd` go build -o webin
FROM alpine:latest RUN apk --no-cache add ca-certificates
WORKDIR /root/COPY --from=builder /app/webin .CMD ["./webin"]
Beautiful. What we did is very simple. We started with our big Golang image and build the app there. We called that image builder in this small pipeline. Down below we use the binary /app/webin from the builder image which is the end result from the go compilation. That’s how we build the alpine based container with just the binary instead of the whole golang (factory? :P) data.
Aaand the resulting image is… OK, you already saw that at the beginning so no surprise here.
$ docker image ls
REPOSITORY          TAG                 IMAGE ID            CREATED              SIZE
kstaykov/webin      latest              76887e697c9f        About a minute ago   10.8MB
<none>              <none>              284f90cd0b4e        2 minutes ago        756MB
golang              1.9.7               f9ff4369deb0        2 days ago           750MB
alpine              latest              3fd9065eaf02        5 months ago         4.15MB
$
I still keep the intermittent 756 MB image just to show the huge difference. Now that 10.8 MB image looks kind of sweet and that’s our whole app within a very small container. A micro service if you will.
In the Java world that would be a maven/gradle build and the resulting image will run a smaller jdk container. Sweet.
]]>Kalin Staykovk.t.staykov@gmail.comhttp://www.kstaykov.euRun Jenkins Master on Kubernetes Cluster2018-06-24T22:39:00+03:002018-06-24T22:39:00+03:00https://blog.kstaykov.eu/devops/jenkins-on-kubernetesSuch a lovely evening. It was a great sunny day near the Black Sea where I’m taking some time off with my family. Now it’s late enough to have a beer and… build a Jenkins master? Why not.
Today I’ll play with Kubernetes - one of my favorite toys lately. I don’t want to waste too much time building my cluster so I’ll use the pre-built package for MacOS - docker + kubernetes. It works great and it’s very simple to install.
Now since I promise you an easy time this evening let’s build our Jenkins master using Helm. That’s kind of a package manager for Kubernetes that you can download from github. It’s basically one binary that uses the context from kubectl which is used to control the cluster.
You’ll need to initialize a tiller (kubernetes agent running on pod over the cluster) and the helm (client) itself. Do that by simply running “helm init”. This process might be a bit more complicated if you’re running it over remote cluster since you’ll need to authenticate first but if you know how to setup remote cluster then that would be a piece of cake for you. So, let’s install Jenkins:
$ helm install --name jenkins --namespace jenkins stable/jenkins
NAME:   jenkins
LAST DEPLOYED: Sun Jun 24 21:58:07 2018
NAMESPACE: jenkins
STATUS: DEPLOYED

RESOURCES:
==> v1/Service
NAME           TYPE          CLUSTER-IP      EXTERNAL-IP  PORT(S)         AGE
jenkins-agent  ClusterIP     10.99.56.118    <none>       50000/TCP       1s
jenkins        LoadBalancer  10.108.218.206  localhost    8080:31573/TCP  1s

==> v1beta1/Deployment
NAME     DESIRED  CURRENT  UP-TO-DATE  AVAILABLE  AGE
jenkins  1        1        1           0          1s

==> v1/Pod(related)
NAME                     READY  STATUS   RESTARTS  AGE
jenkins-789554878-5jfkx  0/1    Pending  0         0s

==> v1/Secret
NAME     TYPE    DATA  AGE
jenkins  Opaque  2     1s

==> v1/ConfigMap
NAME           DATA  AGE
jenkins        4     1s
jenkins-tests  1     1s

==> v1/PersistentVolumeClaim
NAME     STATUS   VOLUME    CAPACITY  ACCESS MODES  STORAGECLASS  AGE
jenkins  Pending  hostpath  1s


NOTES:
1. Get your 'admin' user password by running:
  printf $(kubectl get secret --namespace jenkins jenkins -o jsonpath="{.data.jenkins-admin-password}" | base64 --decode);echo
2. Get the Jenkins URL to visit by running these commands in the same shell:
  NOTE: It may take a few minutes for the LoadBalancer IP to be available.
        You can watch the status of by running 'kubectl get svc --namespace jenkins -w jenkins'
  export SERVICE_IP=$(kubectl get svc --namespace jenkins jenkins --template " { { range (index .status.loadBalancer.ingress 0) }} { { . }} { { end }}")
  echo http://$SERVICE_IP:8080/login

3. Login with the password from step 1 and the username: admin

For more information on running Jenkins on Kubernetes, visit:
https://cloud.google.com/solutions/jenkins-on-container-engine

$
Easy. Once the pod is deployed you can go to http://localhost:8080 and login with username admin and the password you see via this command:
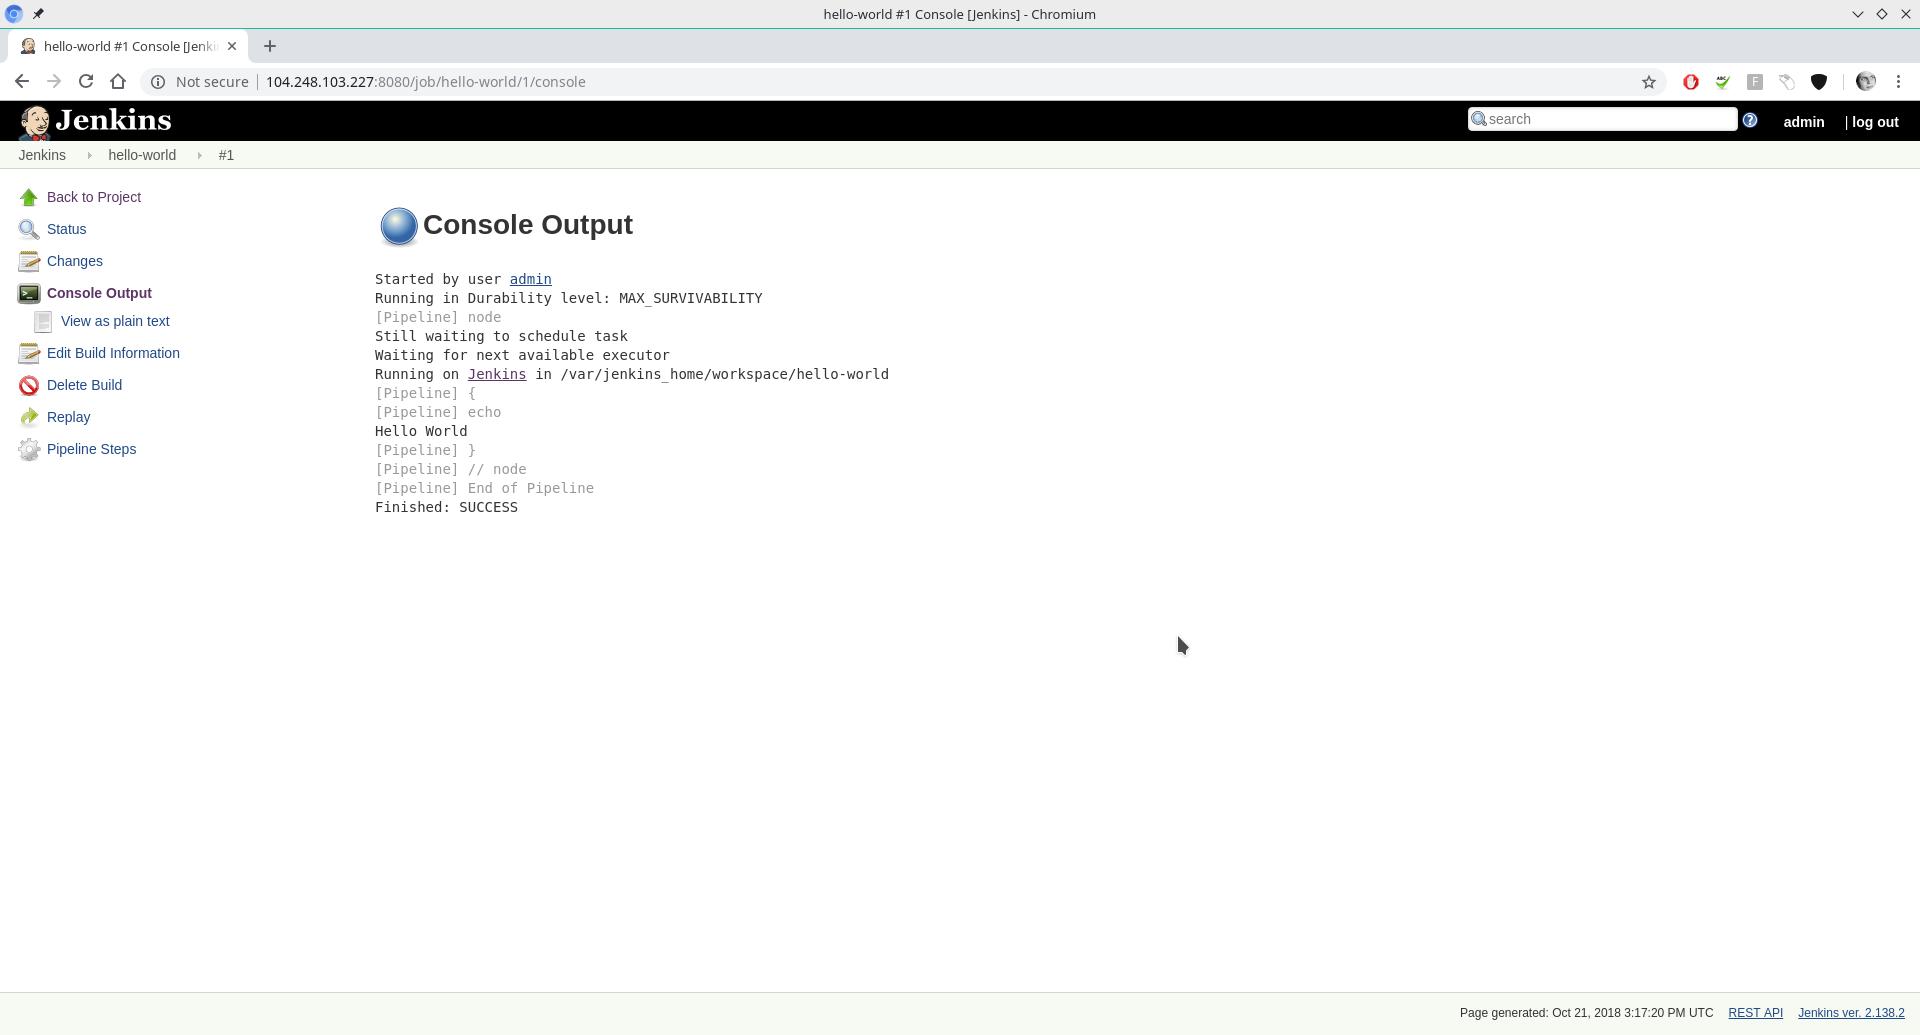
Next I decided to build a very simple pipeline on the Jenkins:
node {
   echo 'Hello World'
}
And here’s its console output:
Started by user admin
[Pipeline] node
Still waiting to schedule task
Waiting for next available executor
Running on default-20hkl in /home/jenkins/workspace/test
[Pipeline] {
[Pipeline] echo
Hello World
[Pipeline] }
[Pipeline] // node
[Pipeline] End of Pipeline
Finished: SUCCESS
All it does is print “Hello World” without even setting up a stage. Now if you run the job you’ll notice the beauty of this setup right away. There is no executor at first but when you run the job a pod will be created automatically for you. When the executor running on this pod is created the job will run.
Now let’s look at some details of what’s going on. We created the Jenkins on a namespace called “jenkins”. Let’s see this namespace and all resources there.
$ kubectl get all --namespace jenkins
NAME                          READY     STATUS    RESTARTS   AGE
pod/jenkins-789554878-5jfkx   1/1       Running   0          1h

NAME                    TYPE           CLUSTER-IP       EXTERNAL-IP   PORT(S)          AGE
service/jenkins         LoadBalancer   10.108.218.206   localhost     8080:31573/TCP   1h
service/jenkins-agent   ClusterIP      10.99.56.118     <none>        50000/TCP        1h

NAME                      DESIRED   CURRENT   UP-TO-DATE   AVAILABLE   AGE
deployment.apps/jenkins   1         1         1            1           1h

NAME                                DESIRED   CURRENT   READY     AGE
replicaset.apps/jenkins-789554878   1         1         1         1h
$
Notice that there is no executor pod at the moment. That’s because the executors don’t persist. They become available when there is demand from the Jenkins master. That’s one pretty good example of scaling your resources and killing them once there is no need for them to stick around.
Now to recap:
Docker + Kubernetes on MacOS was used as initial cluster setup which is very easy to install. Same thing you can get on Windows as well. On Linux you’ll need to do some configuration but it’s pretty straightforward and lots of documentation is available to support you.
We install Jenkins using Helm. It’s easy to start but it will take some time getting used to when you want to configure all the plugins and settings. Helm is using charts which is a way to describe the packages. Tiller is Helm’s agent in the cluster that we initialized.
Then we ran a simple pipeline that says “Hello World” and Jenkins started another pod to run an executor so that our pipeline gets executed.
What happens next is up do you. You can build a Jenkinsfile to support your app and very easily deploy all its setup on the cluster. You can even build a whole CI/CD pipeline to promote your app through the different stages of its lifecycle.
That’s however a matter for another day…
]]>Kalin Staykovk.t.staykov@gmail.comhttp://www.kstaykov.euMove to Netlify2018-05-31T20:23:00+03:002018-05-31T20:23:00+03:00https://blog.kstaykov.eu/blog/move-to-netlifyTime to say hi to my new site hosting - netlify.com
I was using web hosting service up until now but I felt my shell scripting which does scp (because even rsync is even not supported by the hosting) is way out of date. Making this blog a docker container and running it on Kubernetes feels like an overkill and as soon as I saw Netlify with its simplistic interface I fell in love with it.
And now it’s time to say bye bye old way of syncing data to a vhost directory. Netlify is this blog’s new home.
There are lots of things that I like about Netlify. One of those things is definitely the free plans. I managed to deploy two separate apps for free. I don’t see many limits other than the dynamic content part which I don’t use anyway. I might try it in the future as there are some great things I can do with it.
My number one reason for turning to this service is its quick and easy configuration. With just few clicks I:
Configured the deployment from my git repo
Configured the domain I use and got the configuration for my DNS zone
Switched DNS service to Netlify for one of my apps so that they take care of it all.
I can even configure SSL just like that - fast and easy. In the busy world we live in today those little things that save you time are what matter the most. Quick is the new sexy.